Creating a Wisp Lesson
The Wisp Lesson enables students to practice open-ended, scenario-based conversations.
Students engage in dynamic dialogues with the AI, which responds naturally while evaluating grammar, vocabulary, fluency, and coherence.
To learn more about how the Wisp Room works, see Wisp Room Overview.
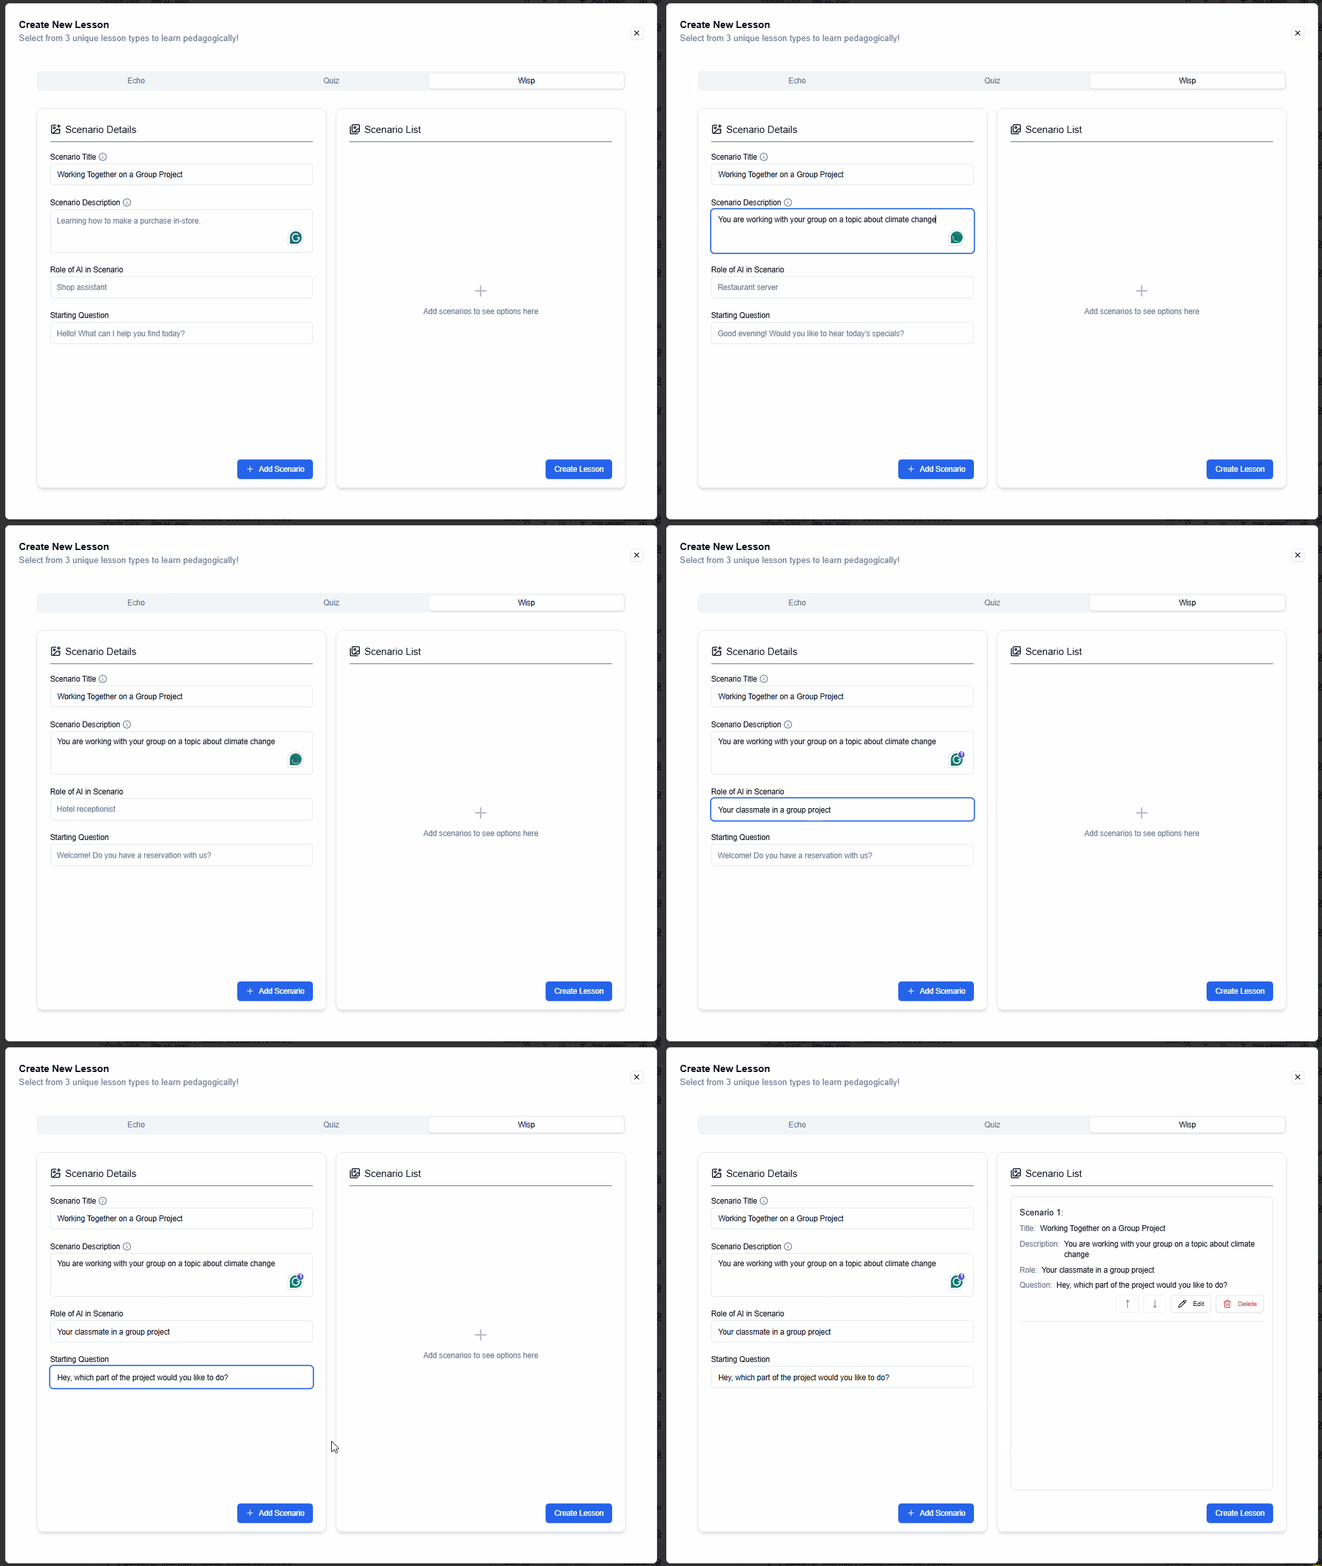
Step 1: Fill in Scenario Details
In the Scenario Details panel (left side):
- Scenario Title – Enter the name of your scenario (e.g., Working Together on a Group Project).
- Scenario Description – Provide a short description of what students will practice (e.g., You are working with your group on a topic about climate change).
- Role of AI in Scenario – Define the AI’s role (e.g., Your classmate in a group project).
- Starting Question – Write the first question or opening line that begins the conversation (e.g., “Hey, which part of the project would you like to do?”).
- Click + Add Scenario to include it in your lesson.
Step 2: Manage the Scenario List
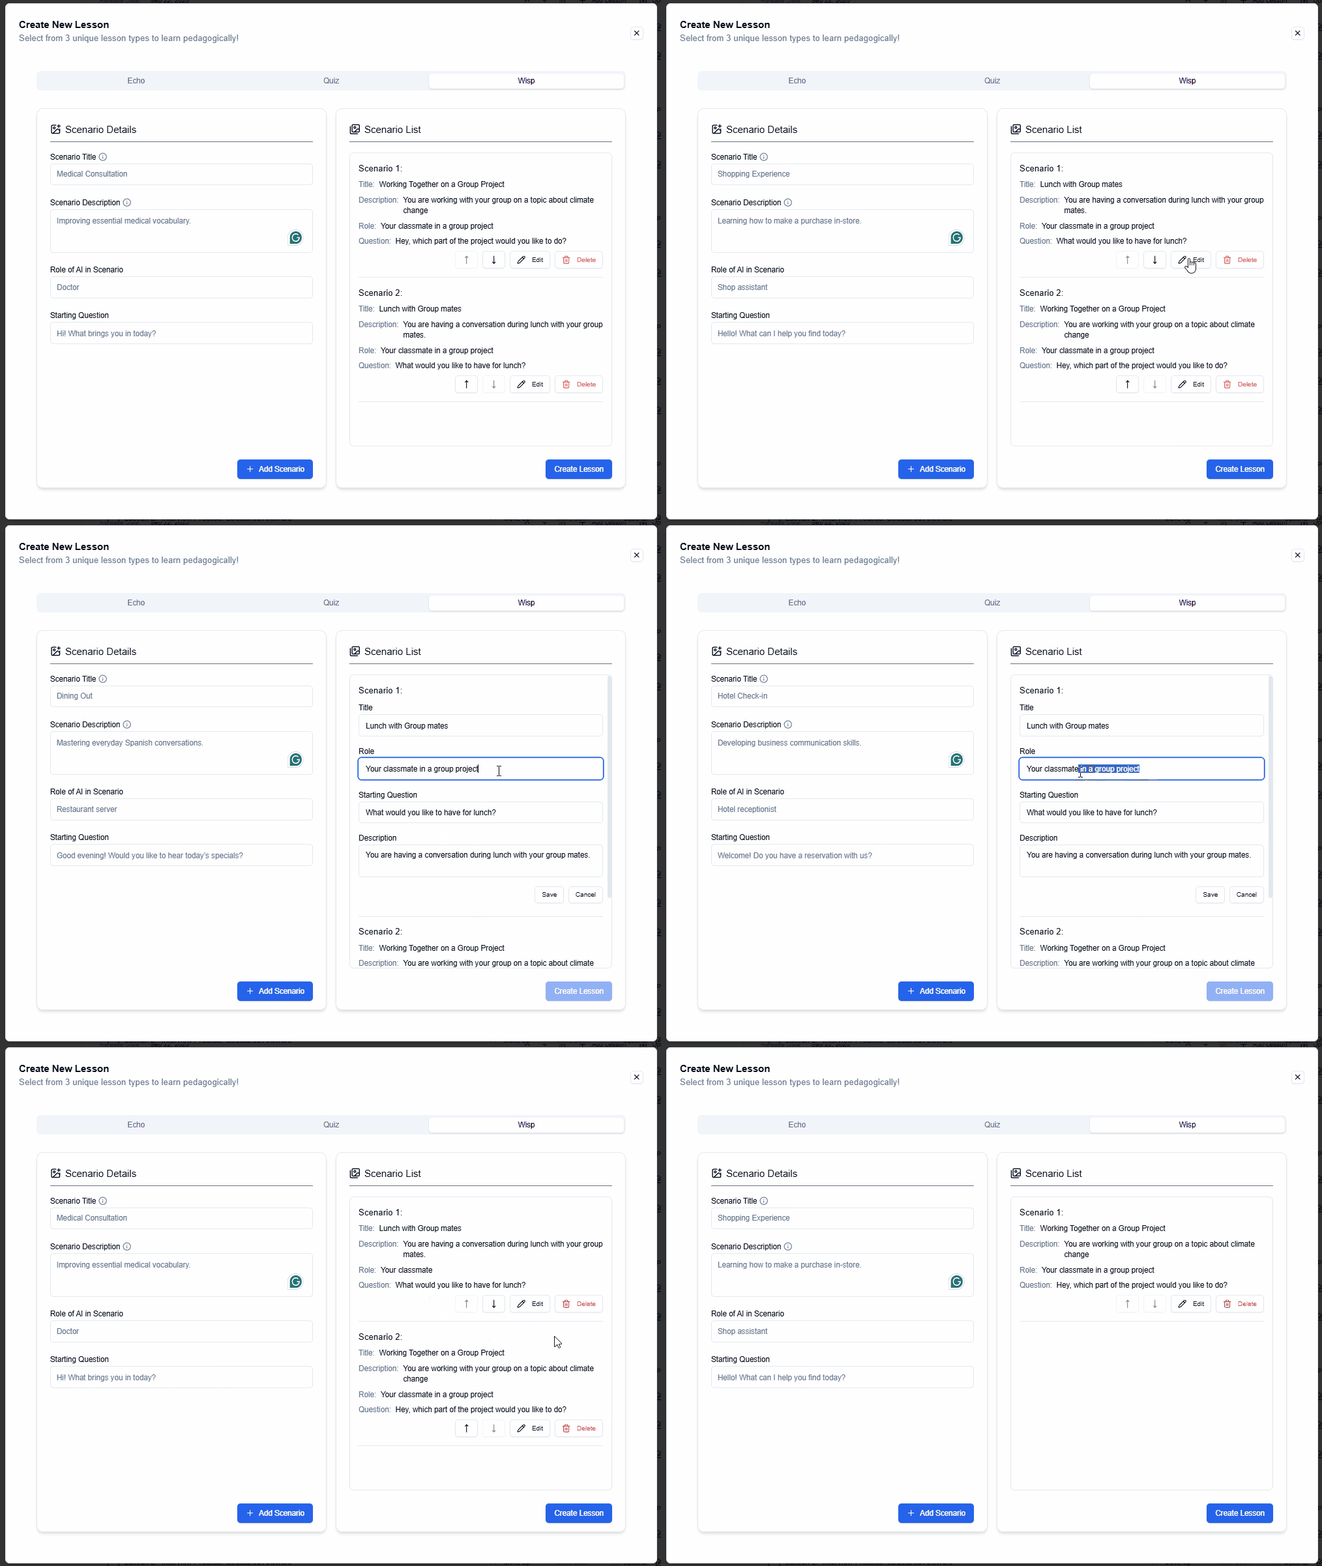
In the Scenario List panel (right side):
- Each new scenario will appear with its Title, Description, Role, and Starting Question.
- Use the arrow icons to reorder scenarios if you have more than 1 scenario.
- Click Edit to update scenario details.
- Click Delete to remove a scenario permanently.
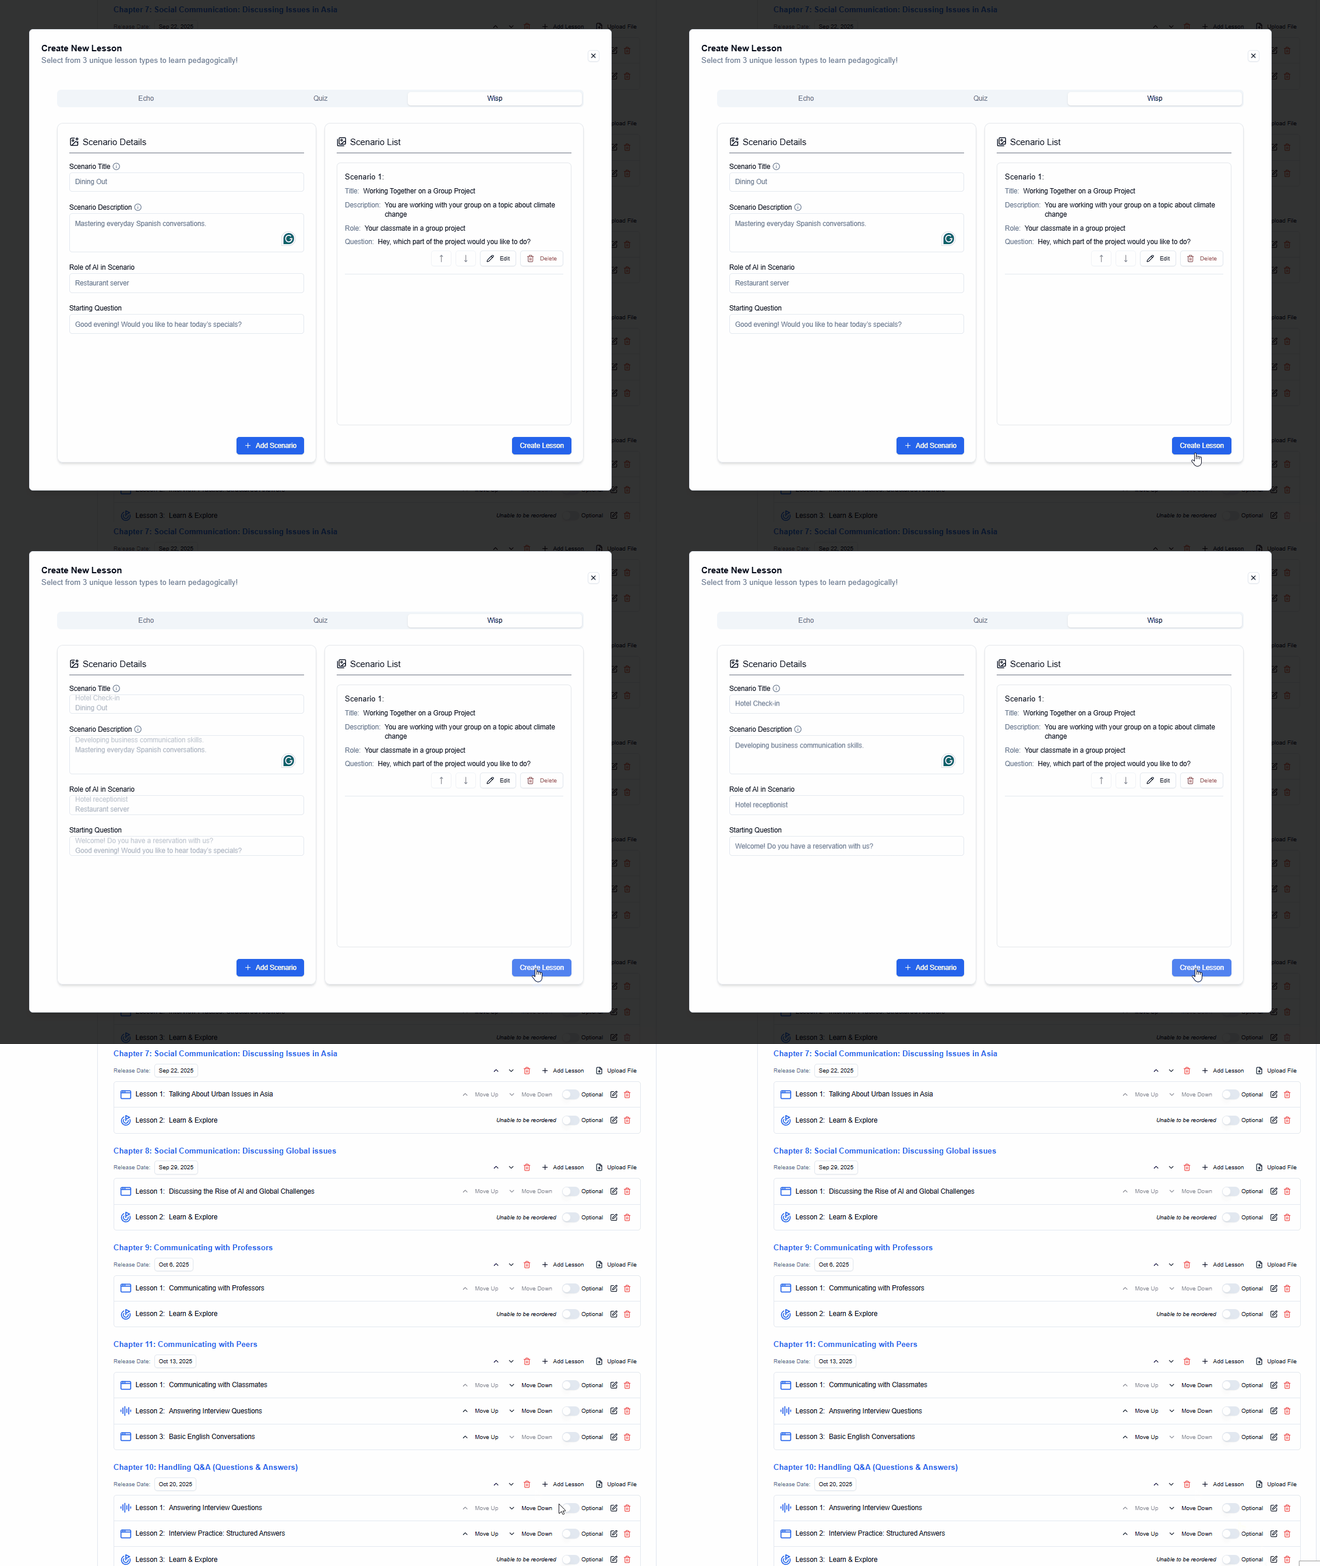
Step 3: Save Your Lesson
- Once you have added and reviewed your scenarios, click Update Lesson.
- Your Wisp Lesson will now appear in the chapter’s learning plan.
- Students will interact with the Wisp bot turn by turn, receiving real-time feedback after each response.
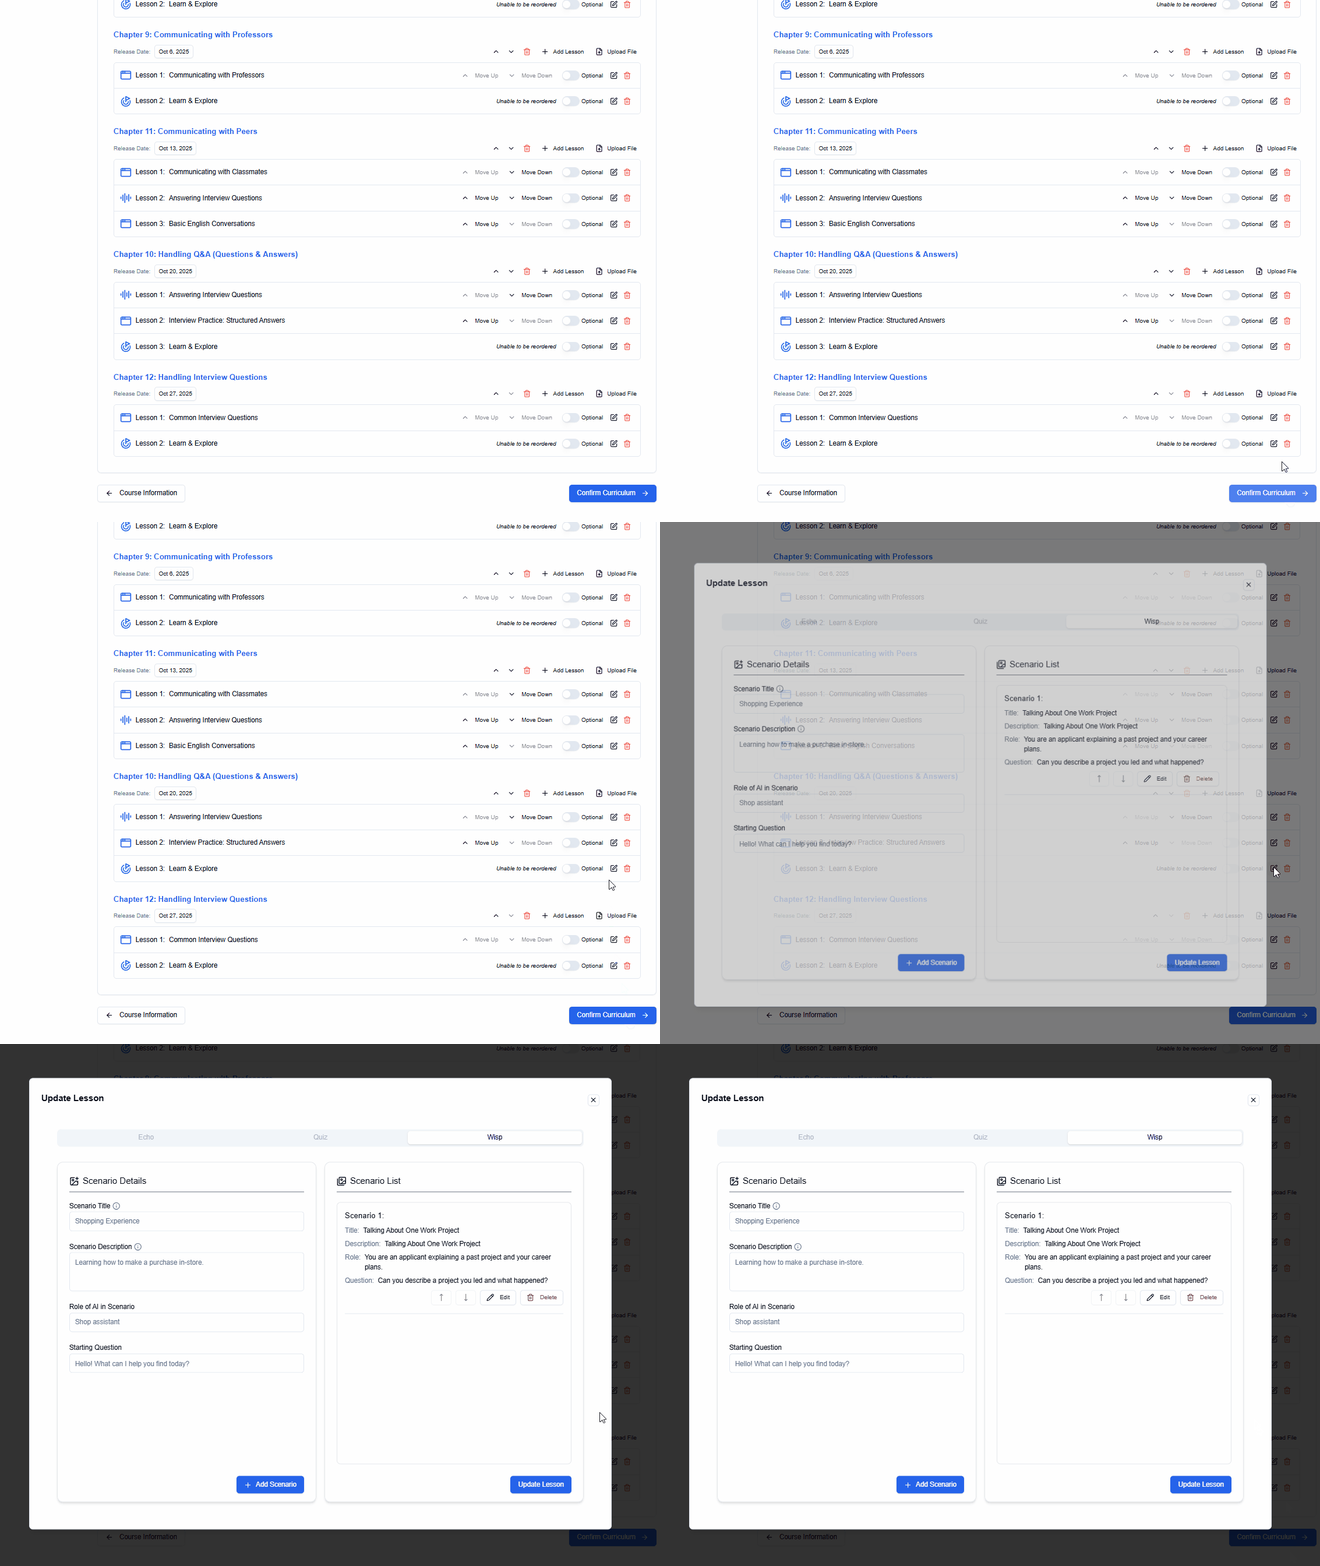
Step 4: Edit Lesson
- To make changes later, click on the Edit Lesson button in the chapter view.
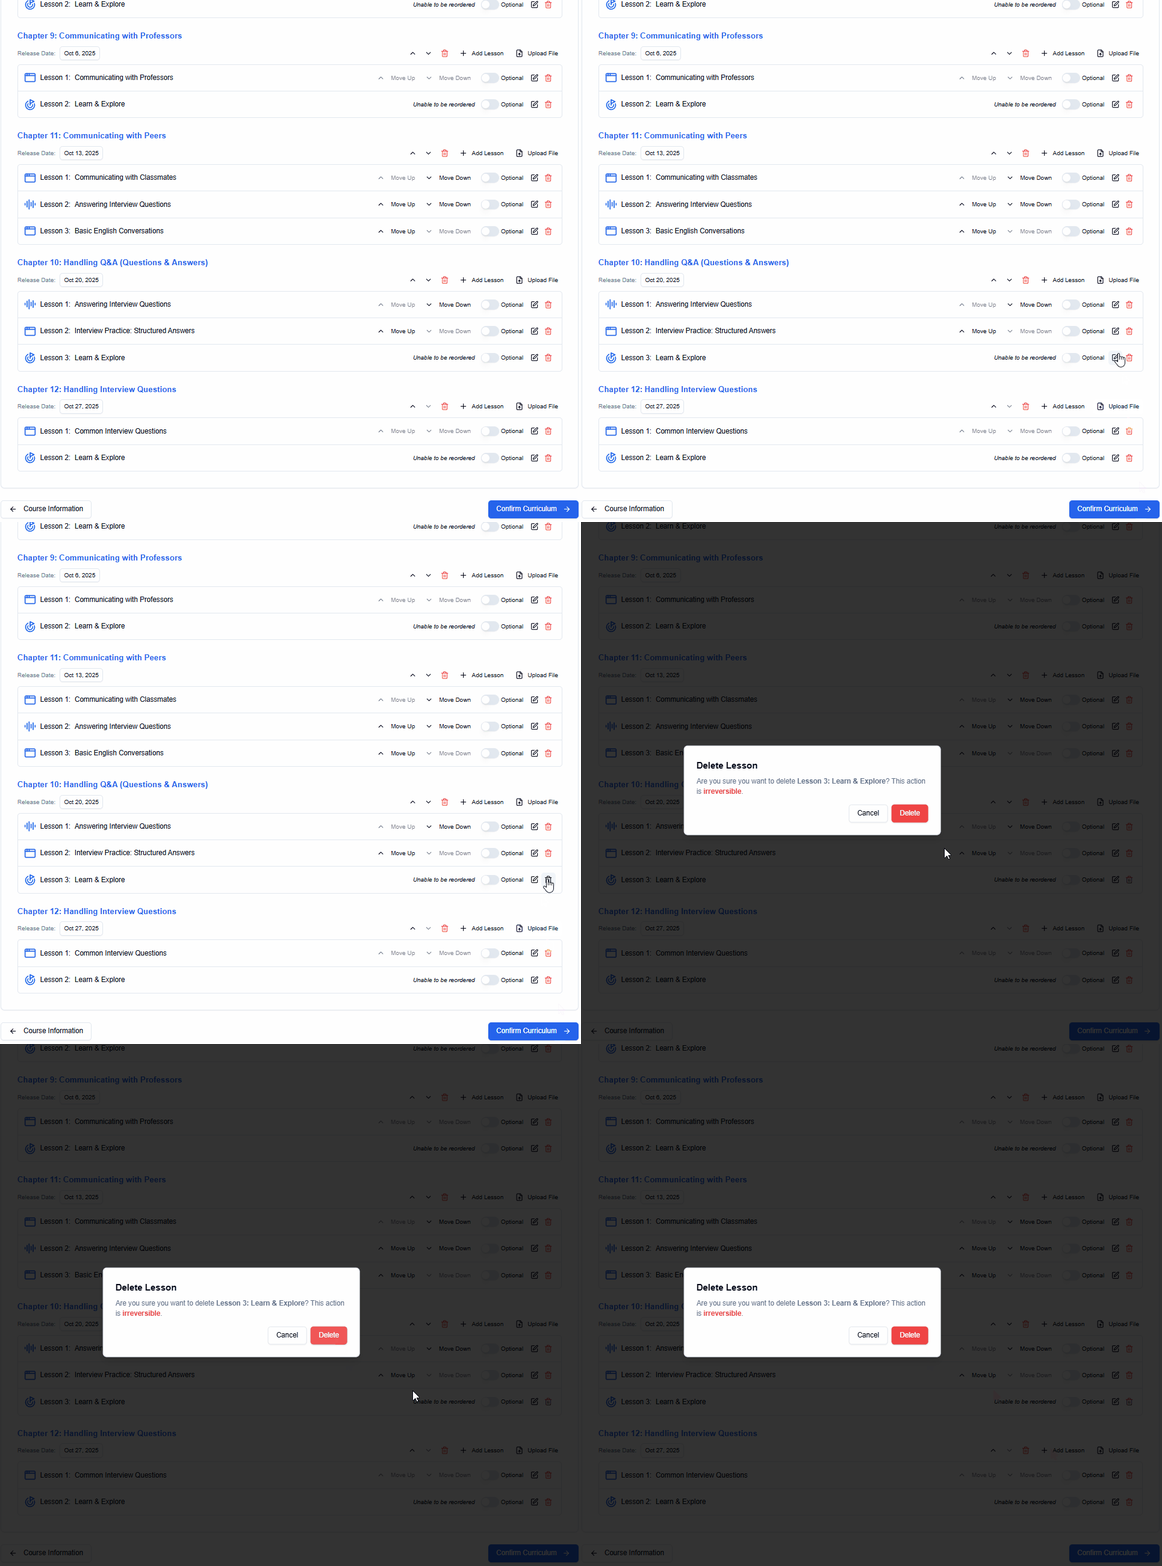
Step 5: Delete Lesson
- If you would like to delete the lesson, click on the Delete Lesson button.
Next Step
After creating your Wisp Lesson, you can continue building your chapter by adding Echo or Node lessons to provide a complete learning experience.