Managing Class Settings
The Class Settings page allows you to manage student enrollment and maintain your class settings with ease.
Viewing Class Status
Go to the Class Settings page to monitor and manage all students enrolled in a class.
1. View Enrolled Students
- Access a complete list of students currently enrolled.
- Each entry includes the student’s name, email, enrollment date.
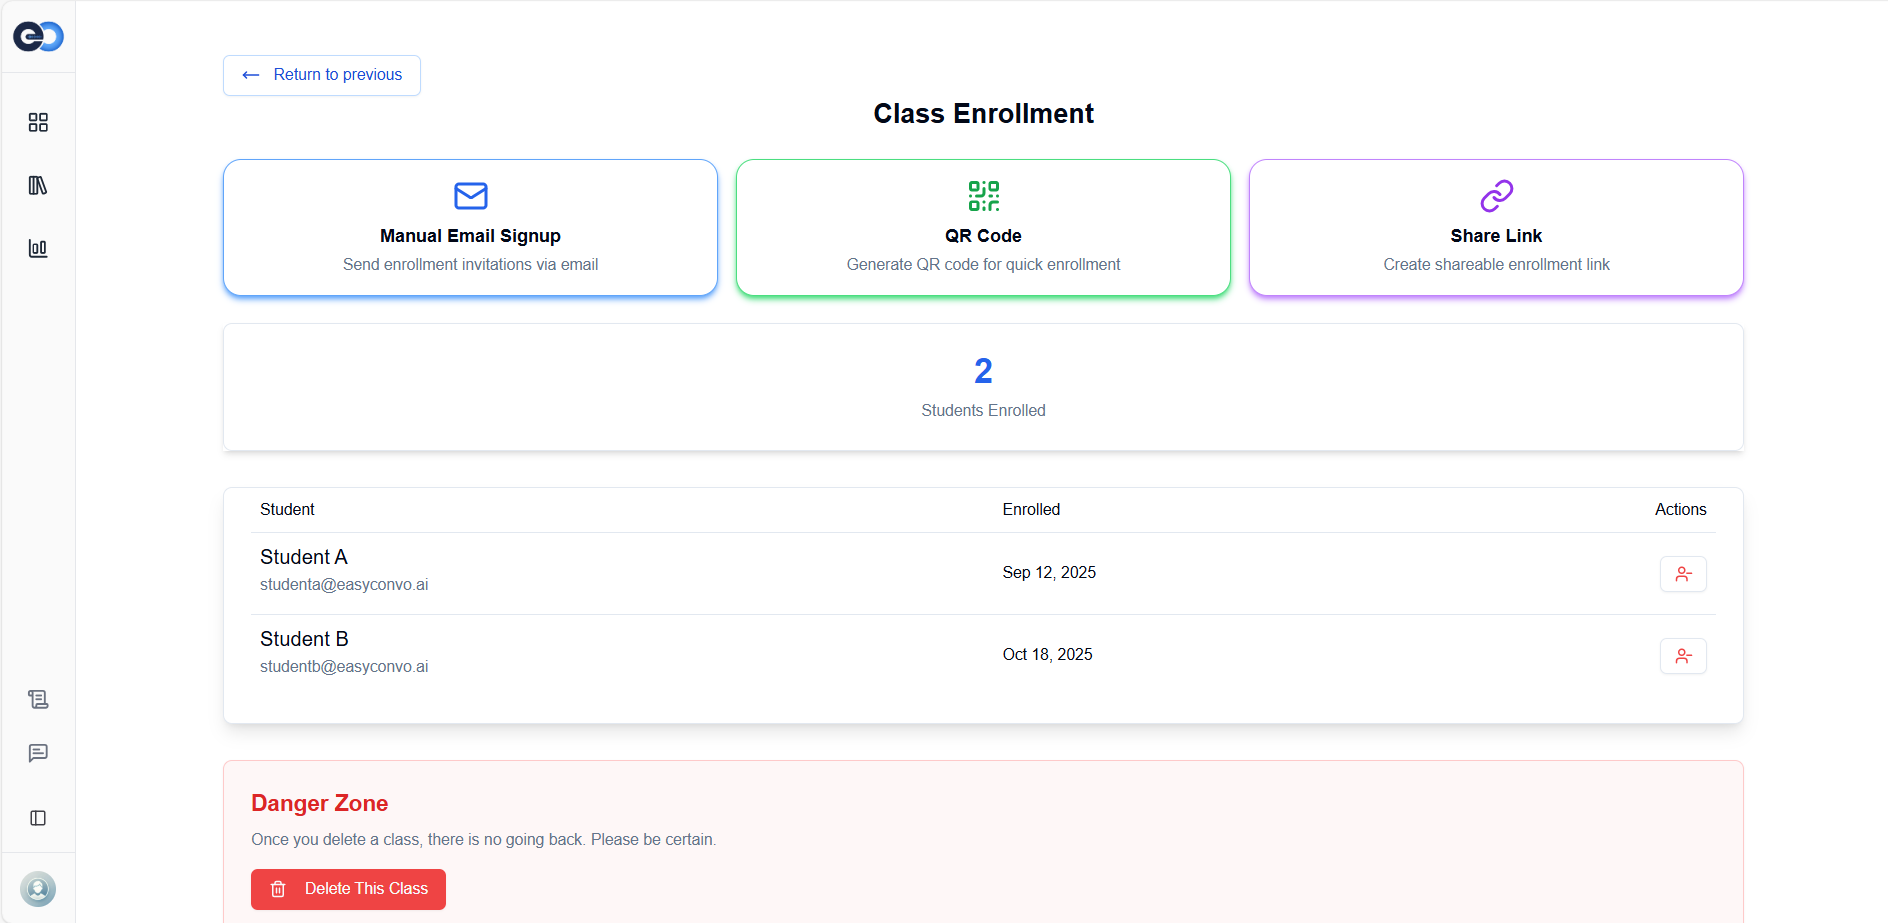
2. Enroll Students
-
Add new students directly from this page using one of the available enrollment methods:
A. Manual Email (Existing Students)
Use this method if the student already has an EasyConvo account.
- Enter their email address in the enrollment field.
- The student will be added to the class automatically.
B. QR Code (For New Students)
Use this method when students do not yet have an EasyConvo account and you want to onboard them live during a session.
- Click Generate QR Code.
- Students scan the code to create and verify their EasyConvo account.
- Once verified, they are automatically enrolled into the class.
⚠️ Note: The QR code is valid for 10 minutes. After it expires, a new code must be generated.

C. Email Link (For New Students)
Use this method to invite new students before or after class.
- Click Generate Link.
- A unique sign-up link will be created.
- Share the link with your students. After registration and verification, they will be enrolled into the class.
⚠️ Note: For security reasons, the email link is valid for 24 hours only.
3. Remove Students
- To remove students who are no longer part of the class, click on the remove button on the list of enrolled students.
4. Delete Class
- Permanently delete a class when it’s no longer needed.
- This will also remove all associated student data and class records.
- Click on the
Delete Classoption to delete the class
